Blender Artist Notes #2: Unforgotten render
New little render up. I think this one is probably the best one so far, especially in terms of how I wanted it to look vs. how it actually came out. It works especially well because of the small scope of the environment, which in this case is just part of a workshop tabletop. If I plan to work on bigger environments, I’ll have to brush up on some knowledge before I try it again. Or just use Unreal Engine (heh).
Had to try a few new things for this scene, so I’ll write down some notes here for future reference, as usual.
Final render:
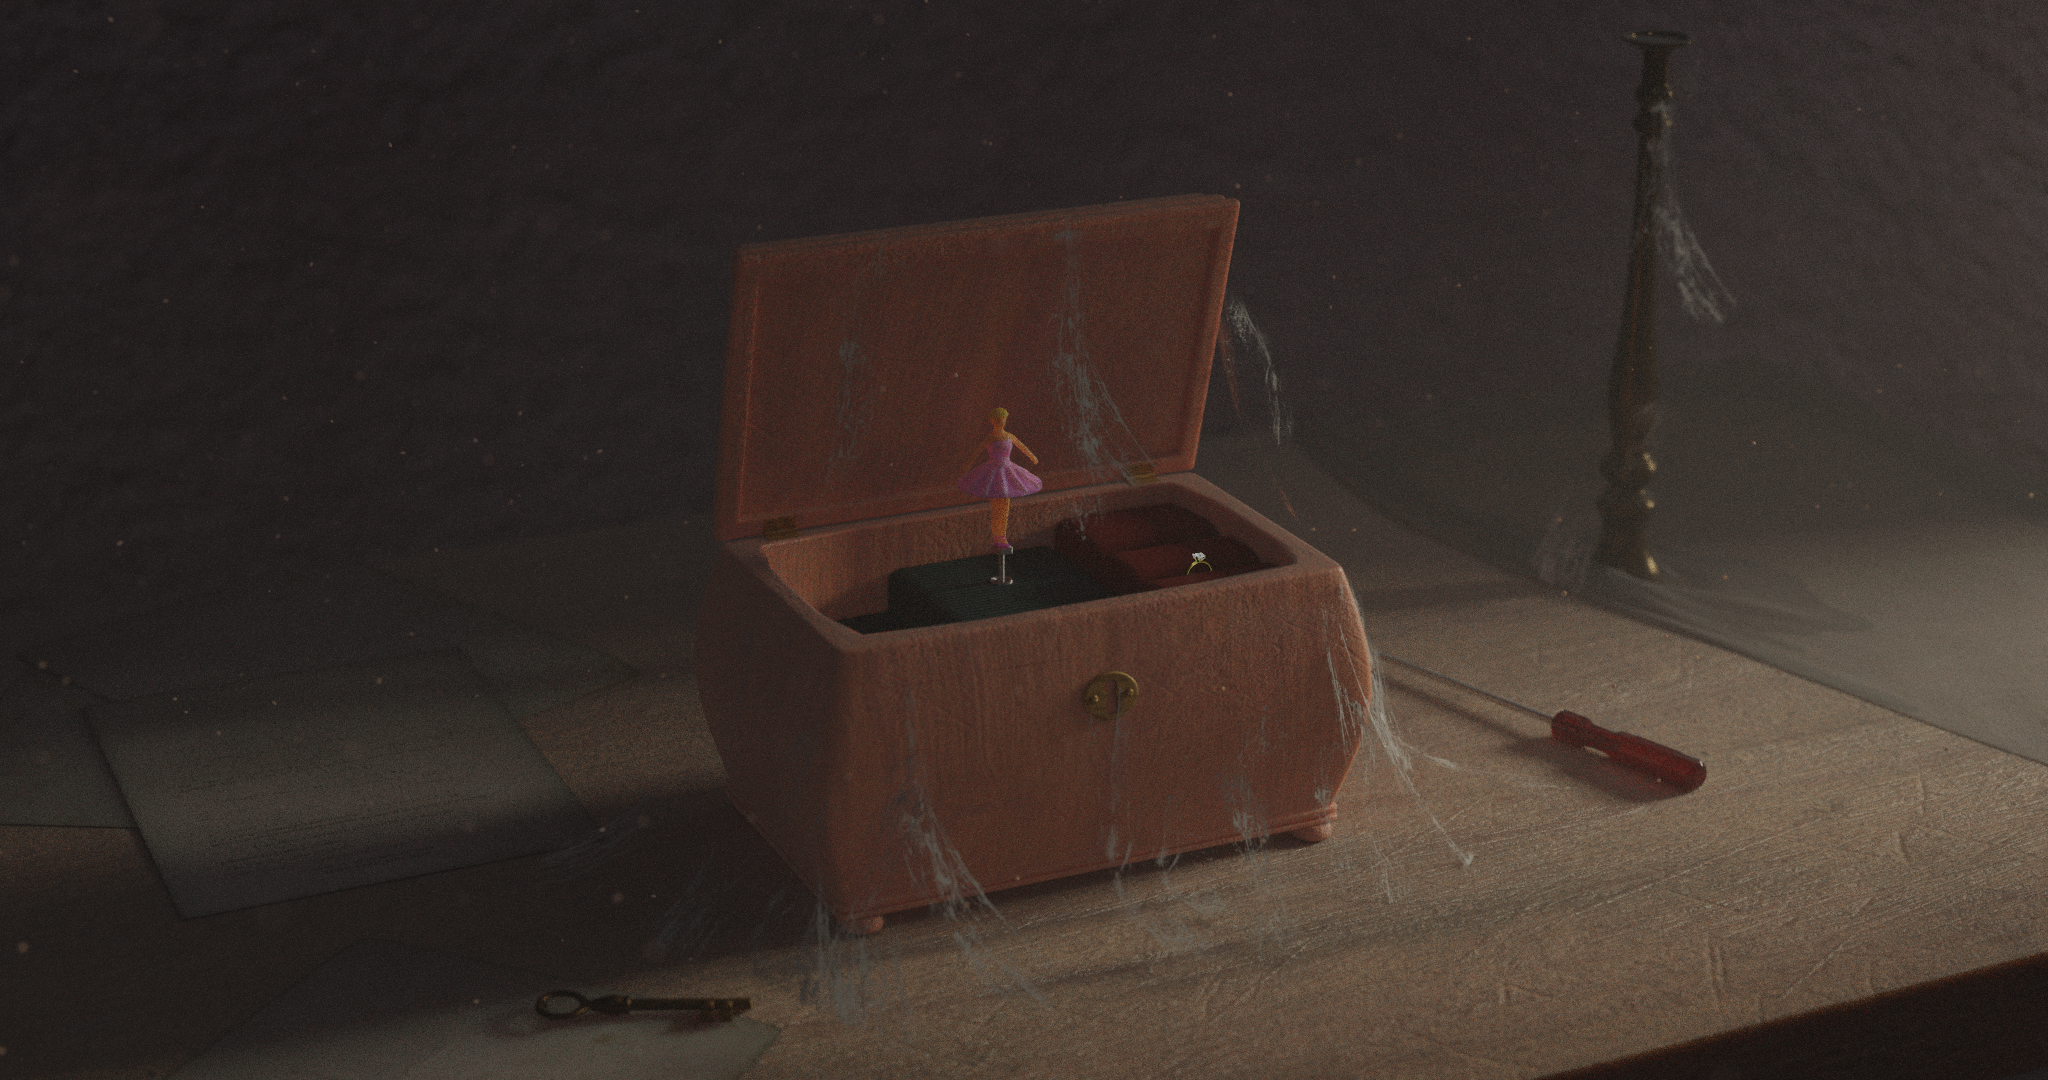
Also, since Blender 2.93 came out a couple of days after I started this, this was done on version 2.92.
Trying out sculpting and the workflow in Blender
Obviously, the dancer in the box was sculpted. In hindsight, probably not the best choice since most of the details is blurred and hidden behind the volumetric lighting anyways. Ultimately, I did learn to properly sculpting and texture the dancer model though, so that’s a nice plus.
Although this isn’t the first time I’ve tried sculpting, it’s definitely the first time it’s been textured and rendered. This meant I had to learn about the workflow as well, which can be somewhat complicated.
There are two main “tools” for detailed sculpting in Blender: the Dyntopo option and the Multiresolution modifier. Dyntopo (dynamic topology) is an option available in Sculpting mode. From my understanding, it adds polygons (triangles, which is weird) to the model. That means the level of detail added is relative to how close the viewport camera is to the model, the size of the brush and the likes.
Meanwhile, the Multiresolution modifier (or “multires”) is added as a modifier under the “Generate” column. Apparently, it’s an older tool than Dyntopo. And it was a bit more confusing to initially use as well. It works similarly to the Subdivide modifier but geared specifically for sculpting so it has 3 main settings to watch for. You can subdivide the model to increase the number of subdivisions to be applied to the model. Then with the 3 settings – Levels Viewport, Sculpt and Render – which set the levels of subdivisions to show in the viewport, when sculpting, and for rendering respectively. You can sculpt the overall shape using lower subdivision levels and then add the finer details with higher levels.
However, Multires doesn’t add any polygons, so they will remain as they are (as quads) when you sculpt and only be displaced. Another difference between Mutlires and Dyntopo seems to be that the former handles fine detailed features better, provided that you give the modifier enough sculpt levels. This video showcases the difference, which I would guess has to do with the triangles used in Dyntopo and the fact that it also creates polygons relative to the camera.
Now with the sculpted model, you have a ton of polygons, generally too much to render sensibly, so you have to bake the textures and apply them to a lower poly model. The available ones in Blender are the normal and displacement maps. Baking with Dyntopo requires two models, the low poly model and the sculpted model, whereas the Multires option only requires one, with the Level Viewport set to a lower level (to act as the low poly model) and the Render set to the (almost) maximum level you went with.
While I think there is a proper workflow to sculpting and baking in Blender (sculpt overall shape with Dyntopo –> retopo the model –> sculpt details with Multires –> bake normals), I went with a simpler method. I began by modeling a cube in Edit mode into a rough shape of the dancer before adding the Multires modifier to it. Five subdivisions was enough for this sculpt and I began to shape the model by sculpting at level 2 first, before moving to level 4.
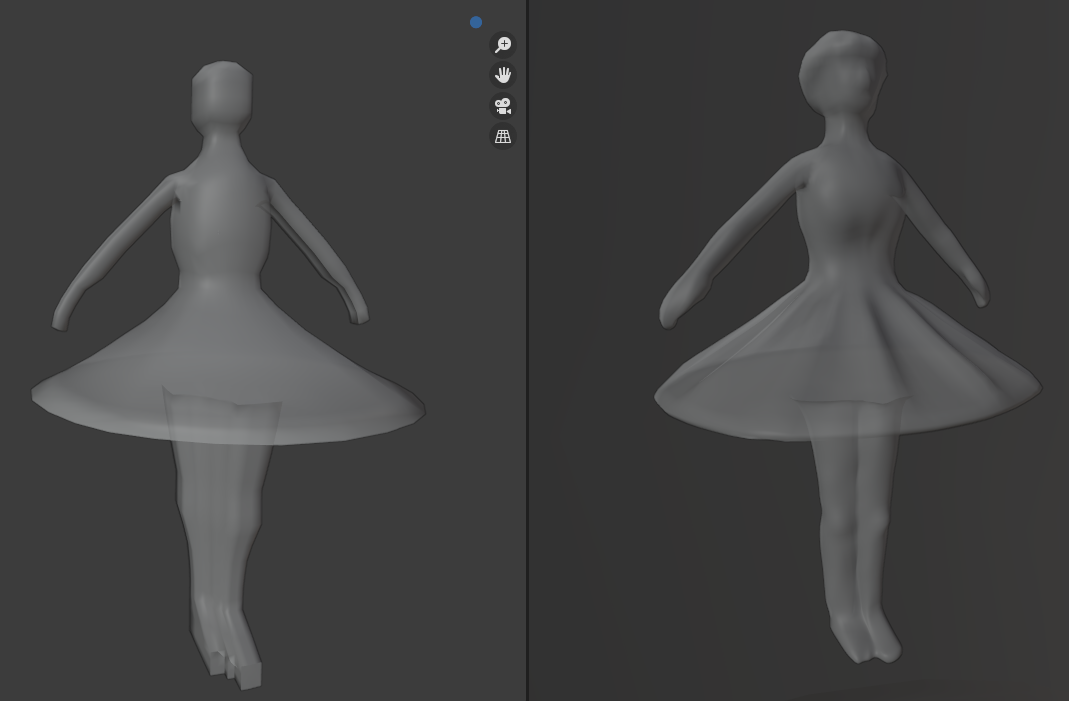
A precaution I learned about later on was in using the Smooth brush, where if there aren’t enough polygons, smoothing the surface will cause the opposite surface to be pulled as well, causing some vertices to end up in weird positions. Since my initial model was too rough (at level 0), I switched applied the level 1 mesh to the model instead before I began baking. UV unwrapping the model was also simpler than I thought and I thought I did a pretty decent job. Then with the UV unwrapped and render subdivision level at 5, I baked the normals and the displacement textures from the model (a new image texture had to be created first, and I made it 4K 32-bit floats without alphas) and applied it to the level 1 mesh.
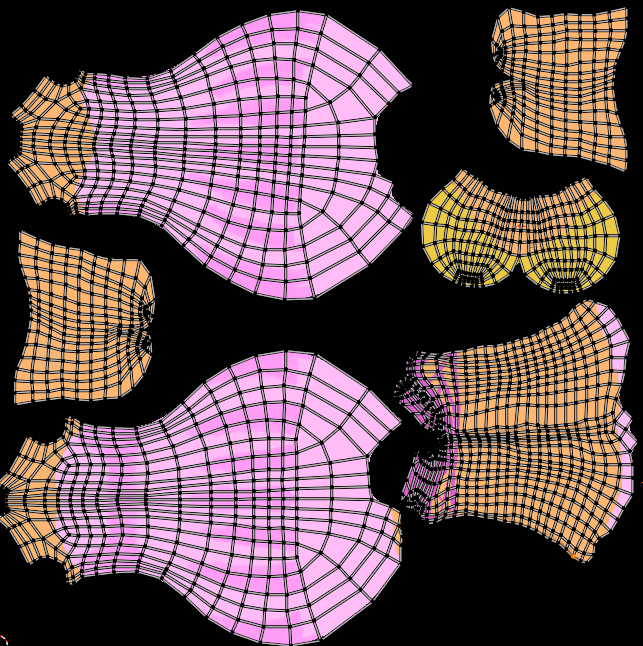
It worked about as well as I expected it to actually, which was good enough for an object that size in the scene. After that, I just painted the model and made the material look a bit plastic-y (with subsurface scattering, which might’ve been too high) and voila!
Diamond and the science behind it
I suppose I could split this part into two because there’s the topic of texturing the diamond and of placing it into this scene specifically.
More complicated than I expected
Texturing the diamond begins as any ol’ modern Blender texturing does, which is with the Principled BSDF shader. Well, I tried that, along with the IOR set to 2.418 (which is that of diamond) and transparency set all the way up… and it just looked like some dense glass. No shiny sparkles or anything to indicate that it was a diamond.
As a side note, Blender has a default way to create diamonds, which is with the Extra Meshes addon enabled. The diamond mesh is then available from the Shift-A menu like other meshes. However, I used the JewelCraft addon, which allows for different cuts of the diamond, as well as options to specify a carat for the diamond size. Since searching the net told me the average diamond size on an (engagement) ring was 1-1.2 carats, which is a width of 6.9mm, that was useful in achieving realistic proportions.
Some scouring of the internet led to a quality in cut diamonds (and some other jewels) – dispersion – and a way to achieve it in texturing. Basically, dispersion is where white light enters the diamond and splits into the different spectral colors of visible light. The viewer of the gemstone will then see a display of colored light (sometimes called diamond fire). This effect can be simulated in texturing using different IORs in the Principled BSDF for different colors of light, before adding them together. If one were very diligent, it should be possible to do all the colors but for practical purposes, I went with only the primary colors RGB.
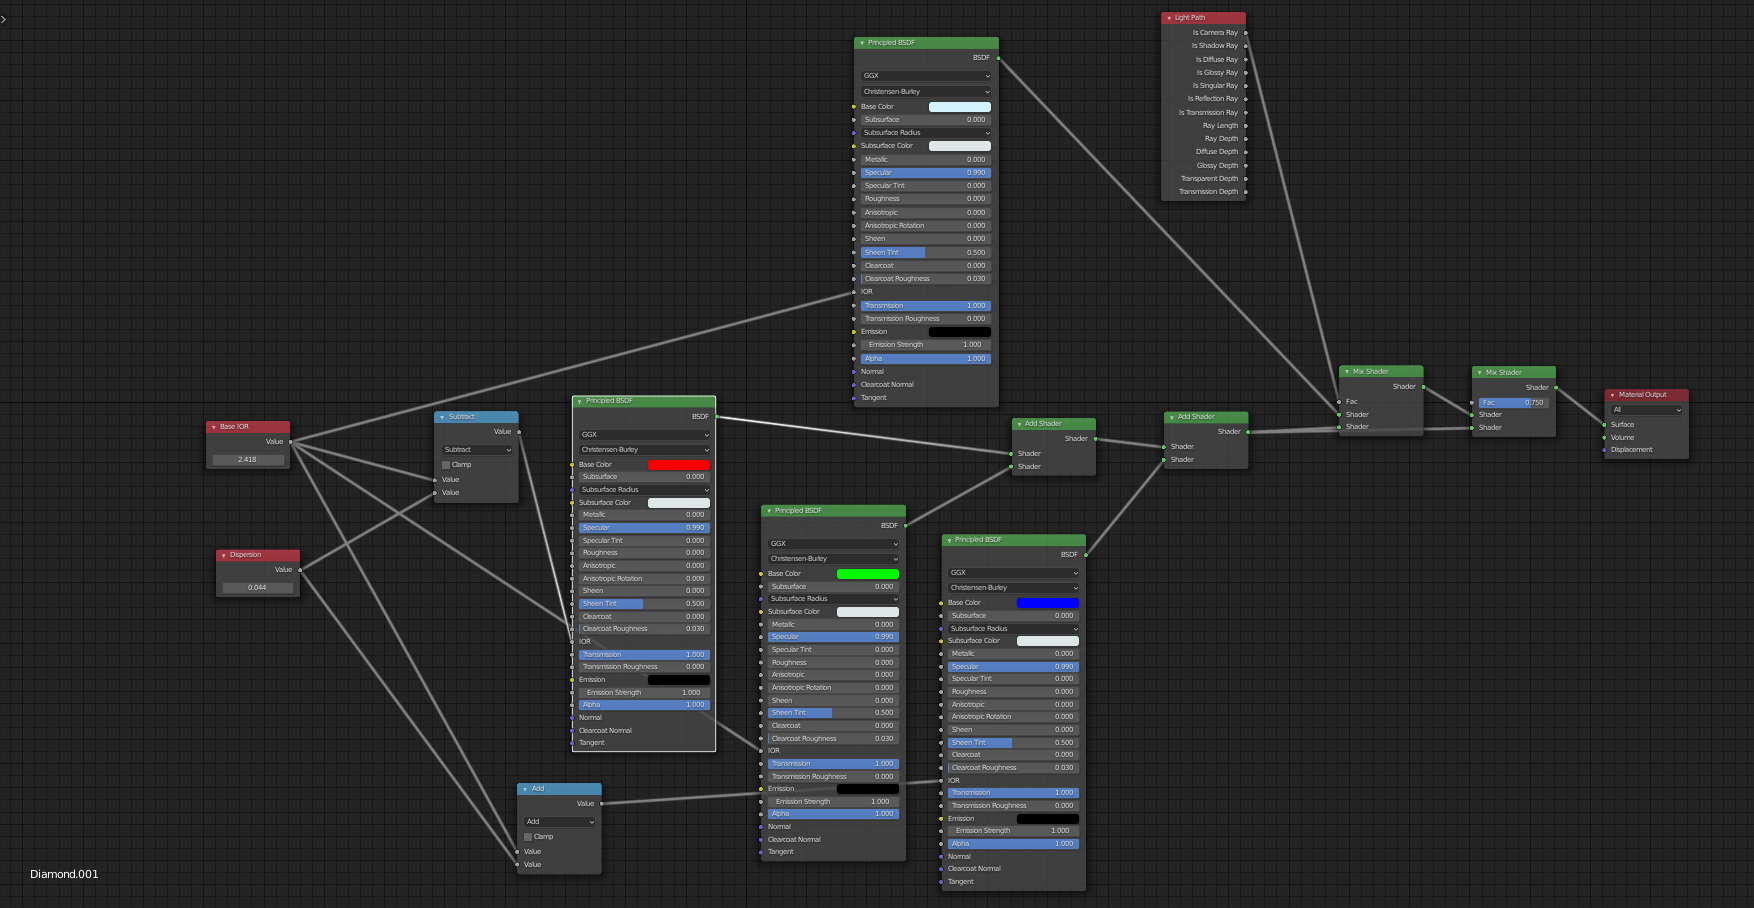
Rendering it was an absolute heck of a task, with how noisy it turned out but denoising the result worked well enough. Here’s a test render I did before I set it into my scene.
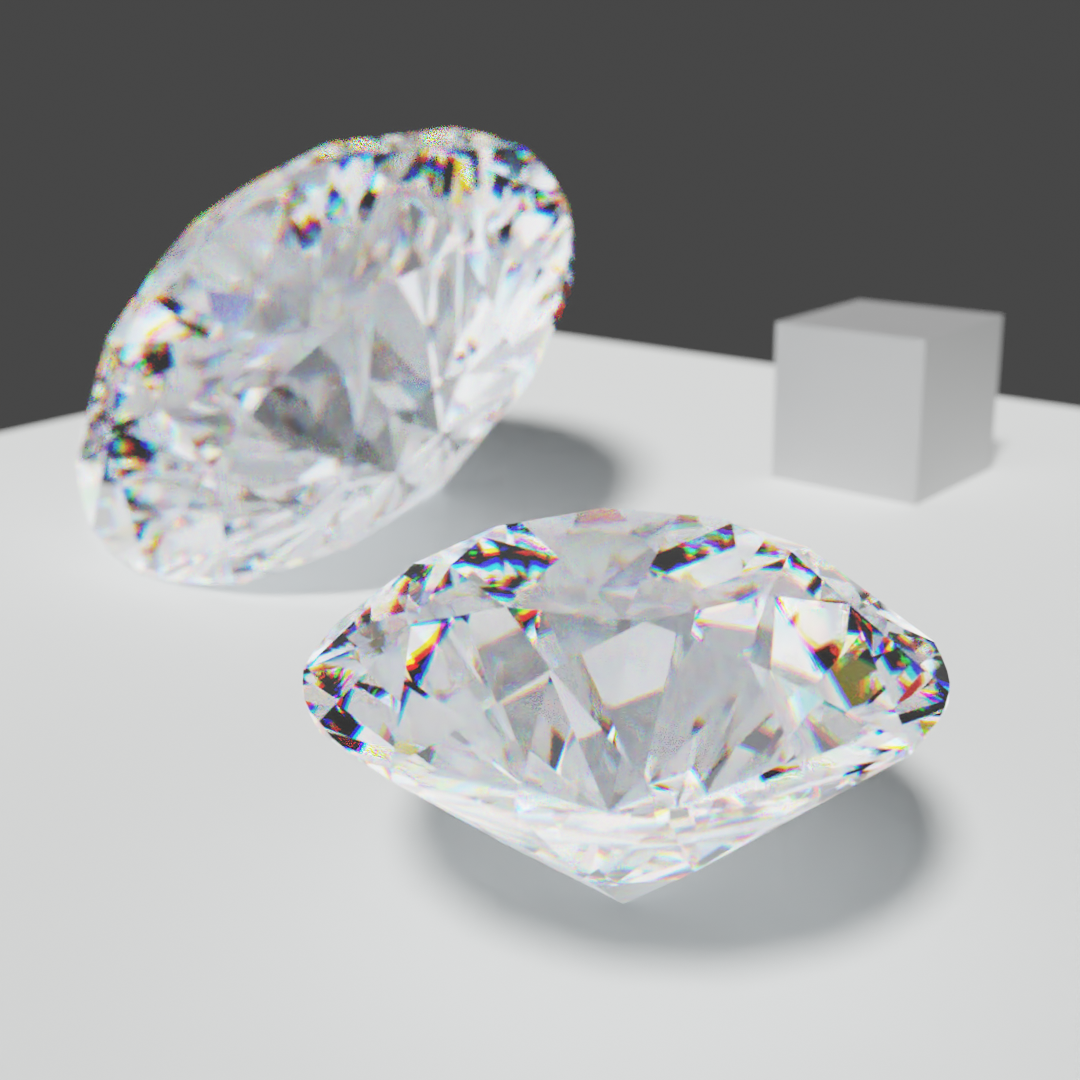
Render layers (or how I fixed a diamond that was too bright)
So the diamond ring was one of the last items I added to the scene. I didn’t think too much when rendering it after the addition, but when I saw the output, I noticed that the diamond on the ring stood out way too much. As in, it was a noisy blob of bright white in a scene that was otherwise supposed to be quite dim.
I suppose it may have been because the scene was set up in a volumetric cube, which I used to get the dusty atmosphere. This meant I had to use a very bright area lamp (as in, with strength in the thousands) to be able to achieve the appropriate brightness. Then for some reason, it meant there was enough light incoming to make the diamond look entirely overblown in the scene. Unfortunately, in reality, diamonds don’t shine bright in such an environment, especially if it’s a dusty room.
The simple solution to this would be to have a separate light source that would light only the diamond, but I found after a quick search that Blender still lacks light linking (what doing that is called in other 3D suites). And that’s when I found the solution through render layers. Essentially, I could render the scene without the ring and the ring without the scene separately, before compositing them in together. One of the hardest parts was getting the lighting to match as best as possible, but still make the ring itself visible. This I did using two lights: one strong light to simulate the area light from the right side and softer, weaker one on the opposite side of the ring to provide a sort of makeshift ambient lighting. I could say it worked well enough. Also, rendering in layers does mean that there is still indirect lighting from the surrounding objects (including shadows), so I didn’t have to worry about that aspect.
What I should note is that for this scene, I added a volume particle system to the volumetric cube as well to imitate dust particles showing up on camera. What this did was it affected the compositing step when using the depth pass, causing “holes” in the object composited back in. This meant I had to add a separate render layer for each scene for specfically just the depth pass, without the volumetric cube. So ultimately, I essentially had four render layers for this entire scene.
As a closing thought though, I would say that this is my best render so far. Obviously, with how much I learned from just working on this, it seems I have quite some ways to go before really becoming an expert.
Maybe I’ll try moving on to something like rigging and animation next, since I know nothing of the animation workflow in Blender yet. Though, with my experience from trying out After Effects, I know that it’ll definitely be quite the tedious challenge.
